Creating a PO from an Estimate
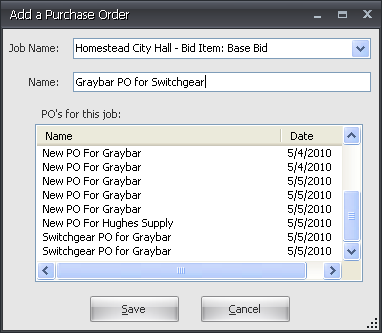
On the tool bar, select Purchase Order, Create From Estimate. Choose a Job Name with any associated bid items or change orders using the dropdown arrow. Enter the name of the PO and click Save.
PO Header
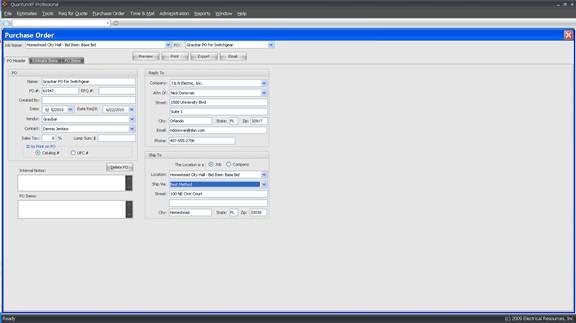
If required, assign a PO number in the Number box, and enter the name of the estimator creating the PO in the Created By text box. Enter the RFQ Number if the PO is associated with a particular vendor quote. The current date will be the default. To change this, click the drop-down arrow to display a calendar, and select a date. Choose Date Required in the same way.
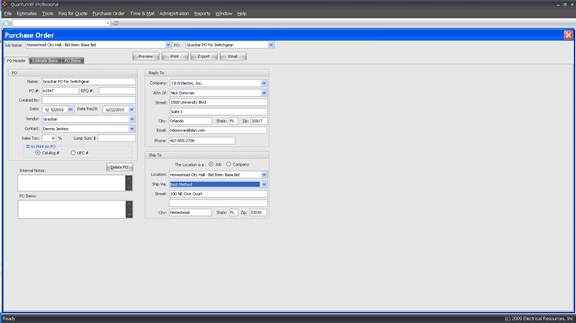
Select the name of the Vendor from the drop-down box, and choose a Contact name. It the material is taxable, enter a Sales Tax %. Next, choose whether to print materials with Catalog Numbers or UPC Numbers.
Pick a company and contact name in the Reply To section. Ship To will default to the job associated with the PO. To have the PO order shipped to a company address, select Company and use the drop-down boxes to select the company name and shipping method.
Delete PO removes the selected purchase order.
Use the Internal Notes window for PO information that is to remain with your company. The PO Memo window is used to print vendor instructions directly on the purchase order.
Estimate Items
Materials from the estimate summary are displayed in the Estimate Items window. Items that were previously selected for quotes in the RFQ process will be highlighted in gray. To group these items together, click the Separate the PO Items box.
You can choose to sort the items by Estimate, Manufacturer or RFQ Vendor.
To select items for the purchase order, hold down the Cntrl key and click the blue box to the left of the items to be included. To add selected line items to the PO, click Add Items to PO. Items selected and added to the PO will be grayed out. To delete items from the PO, select the item or items and click Remove Items from PO.

PO Items
The PO Items tab displays selected purchase order items. To add items to the PO that are not in the estimate, click Add Items. To remove items, click the blue box to the left of the line item and click Remove Items.
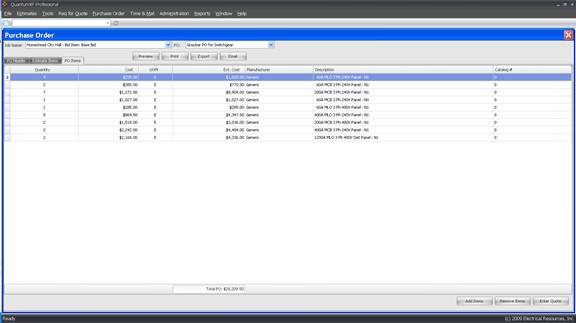
To enter a lump sum quote, hold down the Cntrl key and click the blue box to the left of the items to be included. Click Enter Quote. Enter the amount and click OK. Although the lump sum quote will be prorated across the items selected, the actual quote is being applied appropriately to the purchase order.
To manually enter vendor prices, go to the cost column and click the line item to be changed. Enter the price and click outside the column to record the price. Be sure to note the Unit of Measure (UOM). For instance, if a vendor quotes conduit or wire per foot, it must be converted to per hundred or per thousand.
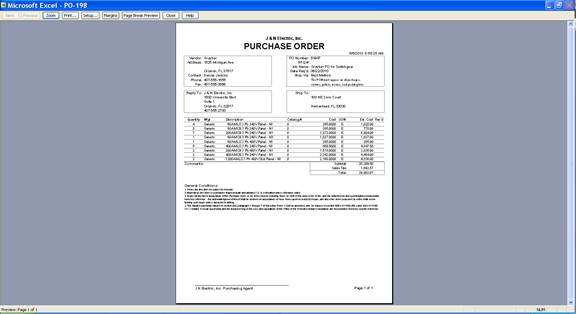
Click Print or Print Preview to print or view the PO before printing. To print on letterhead, select Setup in the Print Preview window, and click Margins.
To export the PO to Microsoft Excel, click Export to Excel. A file name is created automatically, but you can type any name you choose. Click Save to write the file to the hard drive. This function is used to archive the PO or to create a file that can be emailed without Microsoft Outlook Express.
To email the PO using Microsoft Outlook Express, click Email.
To fax the PO using WinFax, click Fax.
To change the default text of the Purchase Order conditions, click Administration on the top tool bar. Select Company Maintenance…My Company…Enter PO General Conditions.